
Starting Healthy Seedlings Indoors
Hopefully you read my last post on The Five Essentials for Indoor Seed Starting. If not, take a few minutes and read it now.
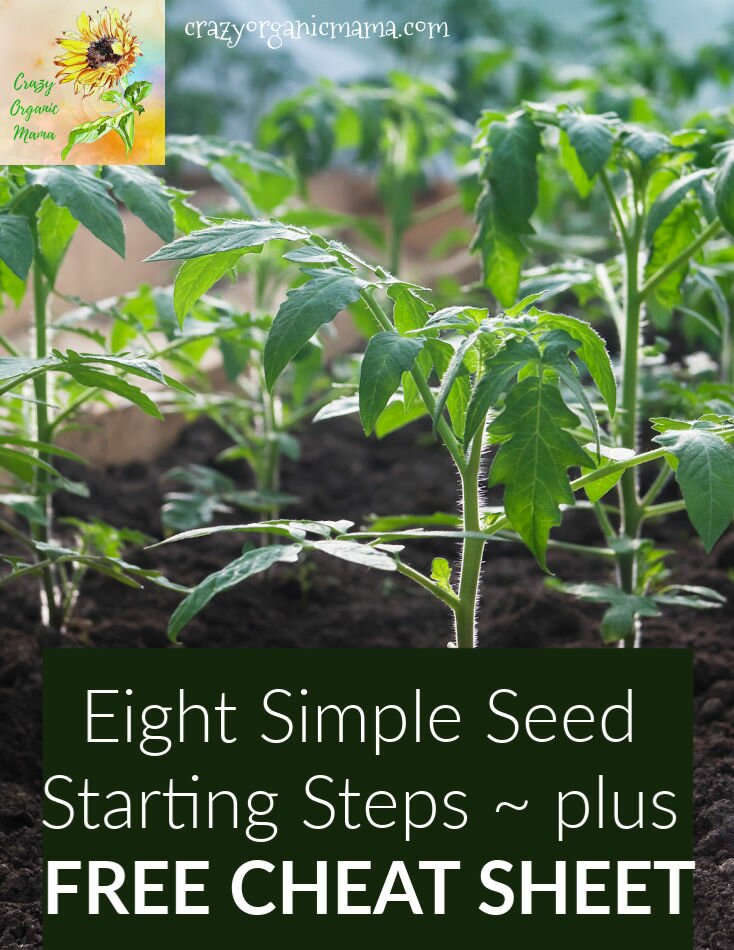
Now I want to talk to you about the eight easy steps to growing healthy seedlings once you’ve got all your supplies.
As we talked about in my last post, you might be anxious about starting your seedlings from seeds, thinking it’s complicated or difficult. I’m here to assure you it’s not.
Step One: Planting
Yup, pretty basic, right? Gotta get those little guys into the soil or they can’t grow. It IS pretty basic, but I want to give you some simple tips that will make you even more successful.
Timing
You’ll want to start your seeds indoors based on the timing on the seed packet and the last frost date for your area.
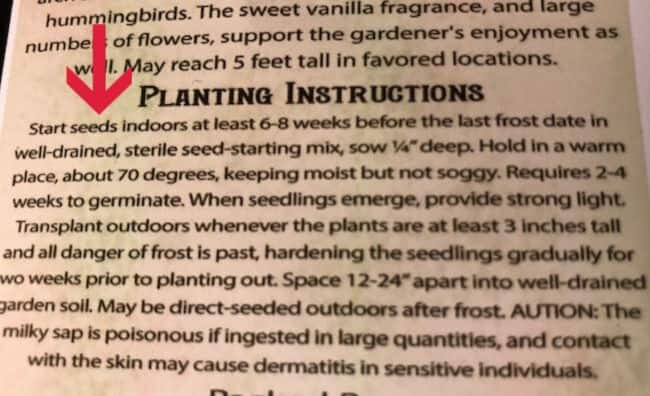
If you’re not particularly familiar with how to read a seed packet, you can head here and read all about it. You’ll want to look for phrasing like “start seeds indoors at least 6-8 weeks before your last frost date” (see pic above). If you see something like “direct sow outdoors after all danger of frost is past”, you don’t want to start those seeds indoors, but rather follow the directions and plant them outside after your last frost.
Maybe you don’t know when your average last frost date is. You can head here to find out. I entered my zip code and the dates for first and last frosts that came up were fairly accurate (unlike some online charts I’ve seen that are off by 6-8 weeks based on my observations!).
Keep in mind that even good ones can be off by a couple of weeks. I tend to err on the side of caution in assuming that my last frost will be a week or two later than any of the calculators out there.
Ok, you’ve got the timing down. Now, what’s next?
Soak your Seeds!
Some seeds require soaking before planting in order to increase germination. However, I’ve had good success with soaking all of my seeds before planting (other than tiny ones like carrot seeds because they clump together and then you end up planting 15 in one hole and it just makes a mess. Noooo, I don’t know this from experience!)
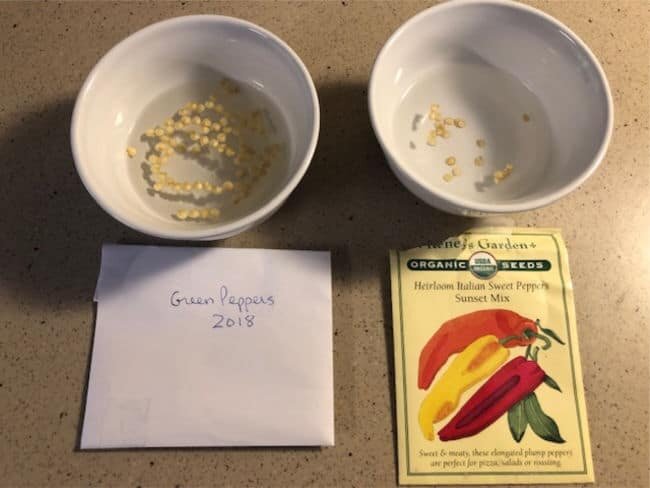
Simply take the seeds you want to plant and put them in a cup of lukewarm water. This is essential for peas, beans and very hard-shelled seeds, which should be soaked overnight. Smaller seeds don’t have to be soaked, but as I said, I do it for most of my seeds. For seeds like these peppers, I only soak for a few hours.
When you’re ready to plant, just drain the water off, dry them a bit on a paper towel (so they don’t stick to your fingers so badly) and plant your seeds.
Planting Depth
Your seed packet should give you guidelines as to how deeply to plant your seeds. If not, plant them approximately 1-2 times as deep as they are wide. Basically, the smaller the seed, the closer it should be to the surface. Don’t worry, no measuring is required, this isn’t an exact science!
Cover your seeds with soil, pat down gently, then water into the tray underneath so you don’t dislodge your seeds.
If you’re finding this post helpful, please head here to grab your FREE copy of my Seed Starting Cheat Sheet, all the content in these 2 seed starting posts condensed into a simple 3-page format. This will also give you access to my entire FREE Resource Library with lots of other goodies you’ll enjoy and find helpful. I promise!
This post contains affiliate links. When you make a purchase through one of these links, I receive a small commission. This does not affect your purchase price.
Step Two: Cover Your Seed Starting Containers
Until your seeds germinate, you can get away with covering your containers with damp newspaper to retain moisture because the seeds themselves (with very few exceptions) don’t need light to germinate.
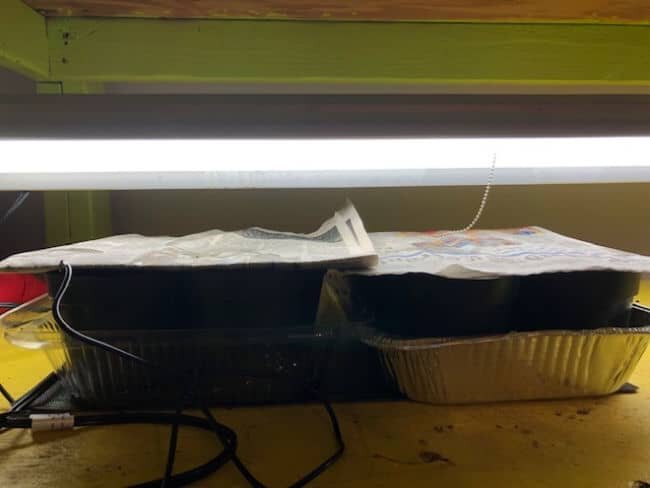
You’ll notice they’re sitting on a heat mat. This is because peppers
like very warm conditions to germinate (80F soil is ideal).
If your seeds need light, the packet will say “surface sow”. In that case, don’t use the newspaper to cover your containers after you plant.
You don’t strictly have to cover your containers, but covering them does retain moisture and make your job easier. An alternative to newspaper is clear plastic, just don’t use plastic if your seeds are in a window. The sunlight shining through the plastic will bake your seeds. Under grow lights, plastic is ok.
Once the seedlings start to grow, you can remove the cover. You’ll need to be really vigilant about watering (we’ll talk about that below) once the covers are off.
Step Three: Watering
Please don’t ever water your seeds or seedlings from the top! This encourages a nasty disease called damping off which will kill your seedlings (you can read about that here) and it’s too easy to damage your tiny plants or dislodge the seeds.
The best and easiest way is to water into the tray under the seeds. Put enough water into the tray to cover the bottom of the seed containers, let it sit for about 30 minutes, then dump whatever water hasn’t been absorbed.
Keep a close eye on your seedlings and water them whenever they start to feel dry. You don’t want them constantly soaked, but you don’t want them to dry out completely either.
Step Four: Light Requirements
Young seedlings need 12-14 hours of light per day. As I covered in my last blog post, it’s impossible to give seedlings enough light in a windowsill, even a south-facing one, in the winter. Therefore, you’ll need grow lights.
When your seedlings first emerge, they should be as close to the lights as you can manage, 2-3 inches is a good distance (you can see that in the picture above). As they grow, you can gradually move them down. If they’re too far away from the lights, they’ll become spindly and leggy, so don’t be too quick to move them away from the lights.
You can certainly buy a timer for your lights, but I just turn mine on when I get up in the morning and off when I go to bed and my plants do just fine.
One thing you don’t want to do is leave the lights on all the time. The plants need a period of darkness each day as much as they need the light.
Step Five: Ventilation
Another cause of damping-off disease is poor ventilation around seedlings. This isn’t difficult or complicated to deal with, however. When I first start seedlings, I keep the ceiling fan on in my seed starting room 24 hours a day. I also try to keep the trays of seedlings spaced apart just a bit.
Another reason you may want to run a fan in your seed starting room is to strengthen your seedlings for their eventual transition to the great outdoors. However, this is a bit of a different procedure.

(and you’ll get dizzy trying to keep it moving!)
I typically run a fan on my tomato seedlings for about a month before they get moved outdoors. I just blow a small tabletop fan on them for several hours a day, turning the seedlings every day. This strengthens the seedlings and encourages them to grow thicker, stronger stems.
I’ve found the fan trick to be especially important for tomato seedlings and haven’t done this for any other plant varieties, but you can certainly experiment to see what works for you.
Step Six: Thin your Seedlings
Ok, take a deep breath. This is the hard part. Once your little plants have started to grow, you’re most likely going to have to thin them out. Unless you plant one seed in each pot, which I don’t suggest because you’re not going to get 100% germination, you’ll have to remove a couple of plants so they don’t become overcrowded.
I will grow up to three seedlings in a moderate-sized pot and just transplant as they grow, but if your containers are very small, one per pot is probably best.
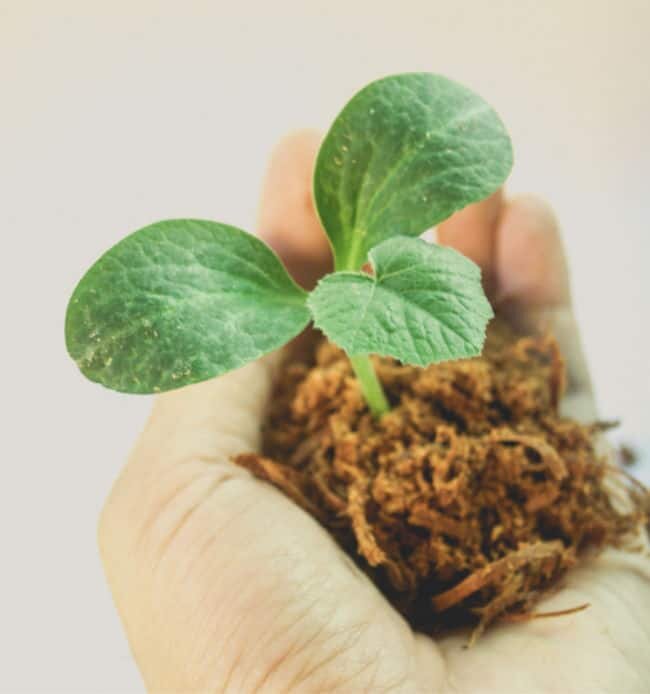
You’ll want to thin your seedlings once they have their first true leaves. What does that mean? You’ll notice when they first start to grow that the seedlings will get one set of leaves, but then a second set will emerge that may or may not look anything like the first set. That SECOND set is the FIRST set of true leaves. Anyone confused yet? Sorry about that!
Just select the smallest, weakest-looking seedling(s) and remove it (them). Here’s the important part, though. DON’T PULL THEM! Doing this may damage the roots of the other seedlings in the pot.
Instead, either pinch or cut them off right at the soil line. I know, I know, it’s painful, but it’s necessary for the health of the others.
Step Seven: Transplant your Seedlings
This step may or may not be necessary. If you’re only growing your seedlings inside for a few weeks, you might not need to transplant them.
However, if you’re growing tomato or pepper seedlings indoors for 6 to 8 weeks, they will likely need transplanted.
Again, this isn’t rocket science. The most important thing is just to be gentle. You can use a spoon or pencil to tease the seedling out of its pot. Then make an indentation in the soil in the new pot so you can gently insert the roots. Pat soil around the plant, water it from underneath, and you’re good to go.
As a rule, you should transplant your seedlings at the same level they came out of the old pot. What I mean is, whatever amount of plant was sticking out of the soil in the first pot should be sticking out of the soil when you transplant.
The one glaring exception to this is tomatoes. You see, tomatoes have this amazing ability to grow roots all along their stems. When I transplant a tomato plant, I strip the leaves from the part of the plant I will be burying, then bury about half the bottom of the plant in the new pot. This will allow it to grow an extensive root system.
When I transplant outdoors, I’ll do the same thing again. It won’t hurt your plant. In fact, your tomatoes will benefit from an amazingly strong root system right from the beginning.
Step Eight: Harden Off your Seedlings for Life Outdoors
This step is crucial, and one that many people (including me!) tend to either rush or skip. Trust me, DON’T!

No matter how bright your grow lights or windowsill, they’re not the same as direct sunlight. If you take a young plant (or any plant really) outside into the May sunshine and leave it there, it’s going to get sunburned and probably die.
Hardening off is, again, not difficult. Bring your young plants outside when the weather is warm enough (after last frost) on a nice day and place them in the shade. Leave them out in the shade for a few hours, then take them back in. The next day, you can place them in the morning sun for an hour or so, then move them to the shade.
If you have a shady area you know won’t be in the sun at all and the nights are warm enough, your seedlings can stay outside at this point. However, you still need to be careful of sun exposure. Start with an hour, then two, then three. Don’t rush this step, it could take a couple of weeks.
Once your plants are tolerating the same amount of sun exposure they’ll get in your garden, you can feel free to plant them.
One Final Note
You may have noticed I didn’t mention feeding your seedlings. Here’s the thing: If you’re using potting mix and compost or soil enhancer as I mentioned in my last post, you probably don’t have to feed your seedlings before they go out to your garden.
Should you decide they need feeding, or you haven’t added compost or soil enhancer, a very weak fish emulsion solution is your best bet (although be warned, it’s stinky!). If you’d like a recommendation, you can check out my Best Organic Fertilizer post for more information.
Again, water in the emulsion from underneath as you would with plain water. It is very important that you remove any excess the plants haven’t absorbed after 30 minutes so they don’t sit in the emulsion solution.
I hope these eight steps have made indoor seed starting seem simple and attainable for you (because it is!) As always, if you have questions, feel free to email me or comment here (I answer all emails and comments personally).
There are a couple of pinnable images at the bottom of this post. If you have an appropriate Pinterest board, be sure to pin this for later! Thank you, and as always, smile and have a crazy organic day!
Posts Related to Starting Healthy Seedlings Indoors
- Five Essentials for Seed Starting
- The Best Organic Fertilizer
- How to Read a Seed Packet
- FREE Resource Library

8 comments
The fan idea is great! Thinning…painful, very very painful. I always try and gently tear plants apart and save them all. (sheesh. and no wonder I’m always behind)
It’s ok, I SAY you should thin them, but I do the same thing.
Hey Dawn, I looked up the average first/last frost at the Almanac site, thanks for that link…we usually hope to get the garden planted after Memorial Day…but still get frosts sometimes after that (Alaska, you know!) So transplants go out mid May. Maybe you can do a post on hardy northern plant seeds (veggies) that can go right into the soil. May 14-Sept 16 average of 124 frost free days…I know some things like peas can go right into the soil and won’t sprout until they are feeling the sunshine love, but can you do the heavy lifting and send me a list? 🙂 I want those tough seeds that say “plant as soon as soil can be worked in the spring.” 🙂
I can dig a little (hehe), but I believe beets, lettuce, spinach, carrots (about 2-3 weeks before last frost), radishes, cauliflower can go in right away. We plant our seed potatoes here well before last frost as well. Daikon radishes are extremely cold hardy. The mustard family (like mizuna) are also very hardy. What zone are you actually in way up there?
I have SO many things I want to transplant before summer if the weather will cooperate, that I haven’t even thought about starting seeds. Thinking of multiple to-dos is hard for me unless I make a list of all the things I want to do and then organize them on paper. Great advice here, and I realized that maybe I could use my 3rd bedroom/grandkids playroom to start seeds! Light bulb moment! Thanks for that!
🙂 gwingal
Any room is a good room for starting seeds! LOL
Hi dear….
Aaawwww I can’t wait to really start.
Last weekend I transplanted my abricottree (home grown), my chili tree (although cut down a lot) and my citrus tree – also heavily trimmed after a cold winter.
But I have own seeds from last year and I am really excited to get started.
I can’t do the last step – getting them used to theno outsides. I live in the city without balcony😔 I open the windows a lot, but last season the tomatoes I transplanted to the urban garden really took a hard hit at first due to extremely hot weather – they came around and gave plenty of lovely, tasty Mini Kumatoes😋 – but they got me worried and if or when I get the option to do that step I WILL. And like you I will advice to do it. Because it is just too sad if you have fed and grown and cared for a plant for weeks and then it just dies before your eyes😭.
And ooooh yeah, trimming those seedlings … man, that’s brutal.
💚💚💚💚💚💚💚💚💚💚💚💚💚💚
Hello! Trimming is brutal, but sometimes it’s necessary! Do you have any way to shade the plants you put in the urban garden? I’m thinking a frame of some kind with shade cloth on it. The thing is, you’d still have to be able to go and put it on or remove it after several hours and that might not be easy depending on how far your garden is from home. That’s a tough one! Any direct sun in an open window would probably help, but that really is difficult. I hope everything does well for you this year and that your trees all live happily all summer! We still have too much snow here to even think about the outdoors. <> Soon…..