
Weed Control that doesn’t Damage your Soil
No-till gardening is just what it sounds like ~ you’re gardening without tilling the soil. You won’t be using a rototiller, plow or anything else (other than maybe a hoe or spade on occasion) to turn your soil.
But if you do this, are you afraid you’re going to end up with monster weeds like Audrey in Little Shop of Horrors? (WOW! I think I just aged myself, like, A LOT! If you have no idea what I’m talking about, head on over here and partake of the silliness).
Oh well, with age comes wisdom, right? (which is why I haven’t watched Little Shop of Horrors in a lot of years!) So, let’s chat.
What are the Benefits of No-Till?
Your back will thank you
First of all, your back is going to thank you, A LOT! You won’t have to get out there and dig and dig and dig. You may have heard of double-digging, which is essentially digging to twice the depth of whatever you’re using to dig with. It’s AWFUL! It’s time-consuming, hard, back-breaking work. If you don’t have to do it, why would you?
Your garden soil will thank you
Second, your garden soil is going to thank you. Ok, fine, not in so many words (and if it does talk to you, we might need to have a chat because it’s possible you’ve been out in the sun too long). BUT, soil that isn’t tilled is going to, over time, have better structure. This means that all those little pores in the soil through which water, nutrients and air pass will stay there to benefit the plants and soil critters and not get crushed by a tiller or plow.

Your soil will also be gaining organic matter due to how you’re going to manage it (more on that below), so you’re getting the benefit of tastier, more nutritious vegetables, fruits and herbs, and more beautiful, bigger, brighter flowers. What could be better? If you need a primer on what soil organic matter is and why it’s important, you can check out my Soil Organic Matter post here.
The critters in your garden will thank you
Again, not literally, and if they do, we’re back to that whole too much sun thing. But, you’ll begin to see critters like earthworms proliferate. The fun thing with earthworms is, as your soil gets healthier, not only will you see more of them, but they’ll get bigger and fatter.
I suppose if you don’t like bugs, this might not be fun, but I’ve had earthworms in my garden as big around as my pinky finger and twice as long! They gross my mom out. I think they’re cool.
There are thousands of critters you can’t see in your soil as well, and they benefit just as much by healthier, non-tilled soil. Mycorrhizae and nematodes aren’t truly visible (although you may occasionally see whitish “threads” in your soil ~ those are mycorrhizae), but they’re even more vital to soil and plant health than all those visible critters.

Mycorrhizae form networks in the soil and between plants (They allow plants to communicate with each other. Cool, huh?), and all those “threads” you see are necessary components in that network. If you till, you break those threads and disrupt their vital work. If I can manage to get a picture of them this summer, I’ll edit and put it in here.
One of these days, I’ll do a post on mycorrhizae in the soil and all the benefits they impart. I actually wrote a 30-page research paper in college on mycorrhizae in the soil. I promise not to reproduce that here because I’d like you to actually come back and read my blog again, but it really is a fascinating subject (I promise!)
Your crops will be more nutritious
As I was writing this article, I received an email from Mother Earth News linking to a Rodale Institute article on no-till systems and their influence on the nutritional value of butternut squash.
The article is here if you’d like to read it in its entirety, but basically, the study found that butternut squash grown under two particular no-till systems became MORE nutritious in storage. The concentrations of carotene, lutein, calcium and phosphorus increased in the no-till squash stored over a period of 60 days, versus no increases (and some losses) in squash grown under typical intensive tillage. Yet another reason to go no-till!
The weeds will NOT thank you
Weed seeds must be brought to the surface (or very close to the surface) in order to germinate. If they remain buried, they can’t germinate and will eventually die.
Tilling brings lots of those lovely seeds right on up to the sunshine where they can happily start growing and make your life miserable. BUT, don’t till and they stay buried nice and deep where they can’t drive you crazy.
How Does No-Till Work?
So, since I’ve convinced you (I hope!) that no-till is the way to go, now what? I’m guessing you want to know how in the world you’re going to create a new garden without tilling it. You might also be wondering what you’re going to do with the weeds if you can’t till them (and you’re not going to spray them with nasty old herbicides either, riiiiiight???)
This post contains affiliate links. When you make a purchase through one of these links, I receive a small commission. This does not affect your purchase price.
Creating a New Garden without Tilling
You’re going to love this! I mean, really love it! It’s soooo easy! No cutting the sod, hauling the sod, digging the soil, then putting new soil down on top. Whew! I’m tired just thinking about that! And it IS often called lasagna gardening, and who doesn’t love lasagna???
Now, I will warn you that you need a couple months’ lead time for this, so you may not be able to implement it for early spring this year. But, if you’re able to get things started by April, you should have no problem planting a late summer to early fall crop in your new garden bed.
Here’s all you have to do:
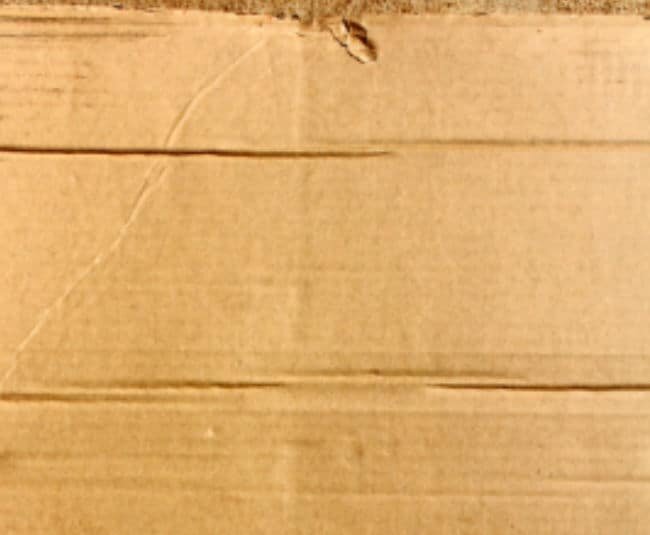
Step One: Cardboard
Not everyone recommends this step, but I think it’s a good idea to guard against weeds getting through from underneath your bed. And anything that foils the weeds before they even start to grow is a good thing!
Go to your local appliance store and ask for some of their big boxes. They’ll most likely be thrilled for you to take them off their hands, and you’ll get them for FREE! WOO HOO!!
Bring them home, cut them open so they lay flat and lay them right over the lawn or soil where you want your garden. Then, spray the cardboard down with a hose so it’s nice and wet.
Step Two: Compost
Ok, this step does involve a little bit of work, but not as much as digging. You’ll want to get hold of high quality compost (preferably organic so there aren’t any herbicides in it) and spread this on top of the wet cardboard. Make sure your layer of compost is at least 4 inches deep. As always, deeper is better.
Step Three: Be patient!
Admittedly, this might be the hardest step! You’ll want to wait a couple of months for everything to settle in and break down. Although, honestly, you can most likely plant some shallow-rooted veggies (think radishes, lettuce, that type of thing) right away as long as you bought well-rotted compost (not raw manure).
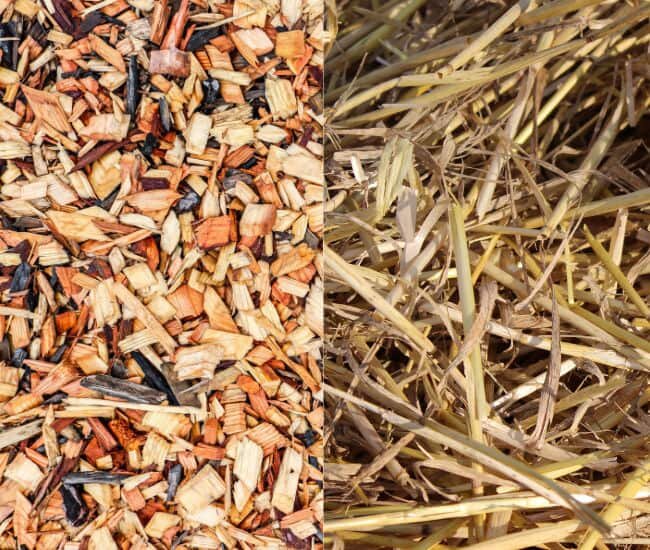
If you do elect to plant right away, remember that you’ll need to mulch immediately. It’s not a bad idea to add a nice thick layer of wood chips (2 inches or so) on top of the compost anyway, but if you’re planting, it’s a necessity. A good thick layer of straw works well also (straw is my preference).
As I’ve mentioned before, PLEASE be sure you’re using straw, NOT HAY! Hay has live weed seeds in it and will make your life more miserable than you can even imagine. Last year, I got a bale of straw that wasn’t processed properly and had live seeds in it and it was AWFUL! Thankfully, I hadn’t spread it in a large area so was able to remove it quickly, but it was a little annoying, to say the least.
Keeping those Weeds at Bay without Tilling
Hand Weeding
I know, I know, it’s no fun. But if you stay on top of things, hand weeding and gentle hoeing isn’t going to hurt your soil and should keep a good number of weeds at bay. The thing is, as discussed above, weeds should diminish in a no-till system because the seeds don’t get brought to the surface multiple times a year via tilling. You do still get seeds blown in on the wind, of course, but it won’t be that many.
I definitely suggest that you go into your garden as soon as the soil is workable in the spring (before things have started to grow) and look around. If you see weeds that are green, these are perennial weeds and they need your immediate attention.
Perennial weeds, as a rule, have very deep roots, so you probably want to dig those out with a shovel. If you’ve been good with your weed control measures, though, there shouldn’t be too many of them floating around.
Flame Weeding
Flame weeding….<<insert evil laugh here>>…is SOOOO much fun! You get this little contraption called a flame weeder (you can find one here on Amazon if you’d like to see it or buy it to experience the fun for yourself) and literally burn those nasty old weeds. Don’t go crazy and buy yourself one of the $200 ones, something in the range of $25 to $50 is sufficient for home use.
It is soooo satisfying to pass the flame over the weeds and watch their leaves curl up! You don’t need to set the little buggers on fire, just passing the flame over them so they wilt or curl is enough.
NOTE: If you have your garden mulched with straw, it’s easy to set it on fire (not that I would know that by experience. <<cough, cough>>) Just be careful, and wear sneakers so you can stomp out the little fires without hurting yourself.
As a bonus, flame weeders work really well in the cracks in a paved driveway where those stupid weeds always seem to grow. And there, you don’t have to worry about setting anything on fire!
Intercropping with Green Manures
From an ecological perspective, green manures are the very best way to deal with weeds. Not only are you keeping weeds at bay, but you’re protecting and enriching your soil, and you’re going to attract pollinators too.
Types of Green Manures
There are many types of green manures and you should do some research to find out which ones are recommended for your area. You’ll also want to decide whether you plan to interplant with the green manures or use them separately from your crops.
Interplanting
Interplanting is just what it sounds like, planting your green manure plants right along with your crops. For instance, you might plant cucumber plants and then sprinkle clover seeds among the plants.
This is a great way to do it, of course, because the green manure will actively grow up around your plants, keeping the weeds at bay.
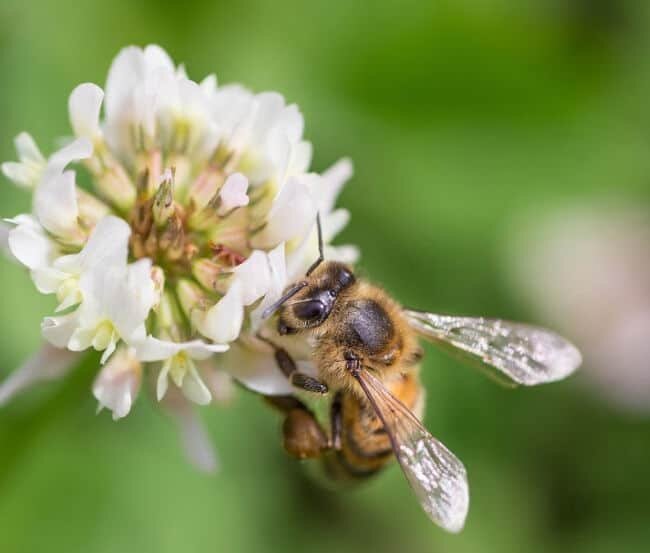
Speaking of clover, it works really well here in the Northeast US. It’s low-growing and attracts bees like crazy, plus it’s a nitrogen-builder, so it nourishes your soil as it grows. It won’t compete with your crops, but forms a thick mat that will keep weeds down nicely.
I haven’t tried clover as an interplanted green manure yet, although I do use it as a winter cover crop. This year, though, I plan to interplant with clover throughout my vegetable garden.
Cover Crops
Any type of green manure is technically a cover crop, but most people think of cover crops as those you plant when you don’t have other crops growing. For instance, you can plant clover or buckwheat in the fall in many areas of the US. Then, in the spring, you can just cut down anything that’s left and leave it on the surface of the soil to help control weeds or gently incorporate it by hand to nourish your soil.
You can, of course, if you have the room, plant a certain percentage of your garden in cover crops (not food crops) each year. This is similar to the principle of leaving a portion of the field fallow for a season, but cover cropping is so much better because it protects the soil, keeps the weeds at bay, and feeds the soil and soil organisms as well.
If you’d like more information on cover crops, Rodale’s Ultimate Encyclopedia of Organic Gardening has a handy chart on pages 177 and 178 with various cover crops and their growing requirements. There’s a newer edition than this, but this is the one I have so I know what pages the information is on! I’m sure every edition has this information, though, as it’s so important.
Mulching for Weed Control
Keep in mind that straw will break down and nourish your soil more quickly.
Of course, good old-fashioned mulch is an awesome weed control tool, too. I use mulch in combination with cover crops to control weeds in my garden.
My mulch of choice in my vegetable gardens is straw and newspaper, but you can use cardboard, wood chips and even black plastic.
I do actually use black plastic for my sweet potatoes, as they benefit from the increased heat in the soil under the plastic here in the northern part of the US. I wouldn’t recommend black plastic in the South, however.
One thing I’ve found that you should keep in mind is that newspaper and cardboard can be slippery underfoot when wet. If you use them in your garden paths, it’s a good idea to put a layer of straw on top of the paper. As you should never walk on your garden beds themselves because it crushes and damages the soil, this is only an issue in the paths.
I hope you’ve found this little foray into no-till gardening interesting and helpful. If you’d like to become an email subscriber and receive access to lots of great free stuff, you can sign up here.
Please feel free to share this post on social media or even pin the images below to any of your relevant boards on Pinterest so you can find it later. As always, comments are welcome and appreciated as well.
Smile and have a crazy organic day!
A Few Other Posts Related to No-till Gardening
- Eight Tips for Beginning Vegetable Gardeners
- A More Sustainable Garden
- Planning Tips for your Spring Garden
- Soil Organic Matter

6 comments
We are ‘working’ on a no-till ‘lasagna’ base for a new raised bed. It began as a trench in a box. We added lots of paper, leaves, small twigs. When I clean the shredded paper nest material from the chicken house, the whole thing goes in the trench. We don’t get a lot of cardboard, but with 2 horses and chickens have plenty of heavy duty feed bags. I have used whole issues of Wall Street Journal to smother weeds and maintain moisture!
Great! Isn’t it wonderful when you can recycle things that would otherwise go in the garbage? Hope it works well for you!!
So much good stuff here, Dawn! When we lived down south, we did use cardboard to try to keep weeds down, but up here in the north I’m reluctant to use cardboard or newspaper because we’re in an extremely dry environment – nothing that could start a brush fire. Love the idea of that fireweeder thing, but we wouldn’t use it up here for the same reason. We’ve been working hard on developing our compost though, and just got some red wiggler worms to help!
Oh, yeah, no flame weeders for you! I never thought about newspaper or cardboard being a fire risk, but of course it’s not here in the Northeast where we get rain regularly and brush fires are few and far between. Interesting. I may have to add that warning to the post, thanks for that. Don’t forget that red wigglers aren’t going to do too well outside when temps get below freezing (which I know is often for you) unless your compost pile is nice and toasty warm.
First of all, in defense of Little Shop of Horrors… I had never watched it but about 5 years ago, our daughter in law, who was the drama teacher at a local high school, put on the production of Little Shop of Horrors. It was awesome! It was so much fun to see kids so INTO performing and I was really impressed.
Second, I really enjoyed learning about no-till. I’ve heard of it and knew basically how it worked but the whys are very interesting! I am a farmers daughter and of course no-till was not a thing when my daddy was farming. But since you layed out the process so thoroughly and made it sound so easy, I’m going to give this a try in a small area this year.
And I had already planned to be serious about cover crops this year.
🙂 gwingal
ps. flame weeding sounds awesome!
Hahahaha! Little Shop of Horrors (at least the movie version) was *interesting*. No-till is just so easy and so much better for everything. It can be a challenge to keep the weeds at bay, I certainly don’t have it all figured out in reality (even though it looks so good on paper, LOL), but I’m learning as I go each year. And yes, I’m definitely getting more serious about cover crops this year. In fact, I need to order some more clover seed. Flame weeding is actually a bit too much fun, I think.