
Making your own Yogurt from Raw Milk
Making your own homemade yogurt is really easy, and what I love about this particular recipe is that you don’t need any specialized equipment for it.
I’m going to give you the ingredients first, then walk you through step by step as I make a batch of this healthy, delicious snack.
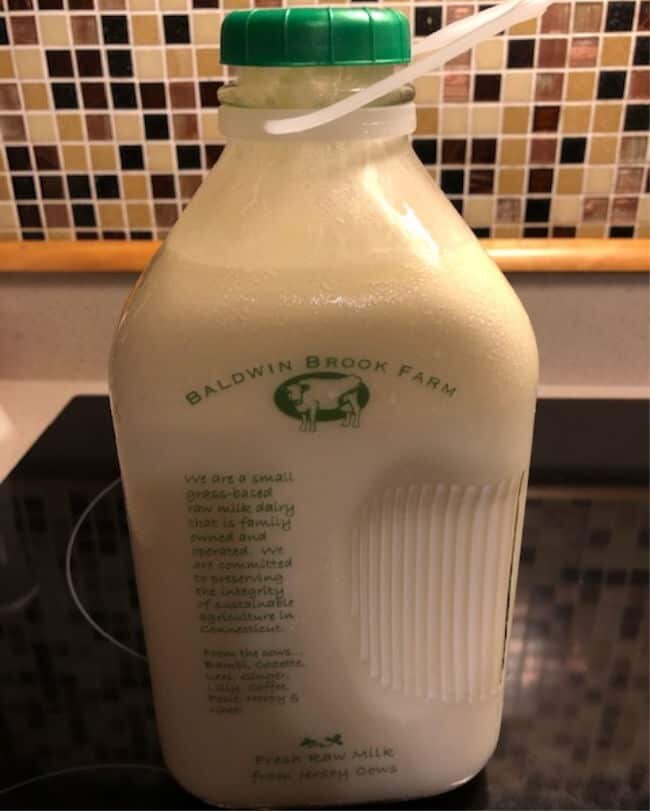
First, I want to mention that you don’t HAVE to make this yogurt from raw milk. It should work with regular pasteurized milk if you don’t have access to raw milk (although I’ve never tried it). However, it WILL NOT work with ultra-pasteurized milk, which is pretty much all I can find in grocery stores around here.
Ultra-pasteurized milk has had so many bacteria removed (both good and bad) that there’s nothing left to culture and it will just sit there and remain stubbornly milk-like, no matter how long you wait. Trust me, I know this from personal experience.
NOTE: You may have heard that raw milk is dangerous. Here’s an article I found that might help you a bit, if you’re interested. However, this recipe calls for the yogurt to be heated to 180 degrees F. This temp kills the bad bacteria without killing the good ones you need for your culture. Don’t, however, heat it more than that or you kill the good guys too! If you’re truly not comfortable using raw milk then, again, regular pasteurized milk should work, although I can’t be sure.
This post contains affiliate links. When you make a purchase through one of these links, I receive a small commission. This does not affect your purchase price.
What You Will Need
- 1/2 gallon raw (or regular pasteurized) milk
- 2-3 Tbsp plain yogurt (this is to jumpstart your culture) ~ I’ve been told you can also open a couple probiotic capsules and use those, but I haven’t personally tried it
- Glass or ceramic bowl large enough to hold the milk (be sure it’s heat-proof enough to deal with 180F milk)
- Lid for bowl or plate to use as lid
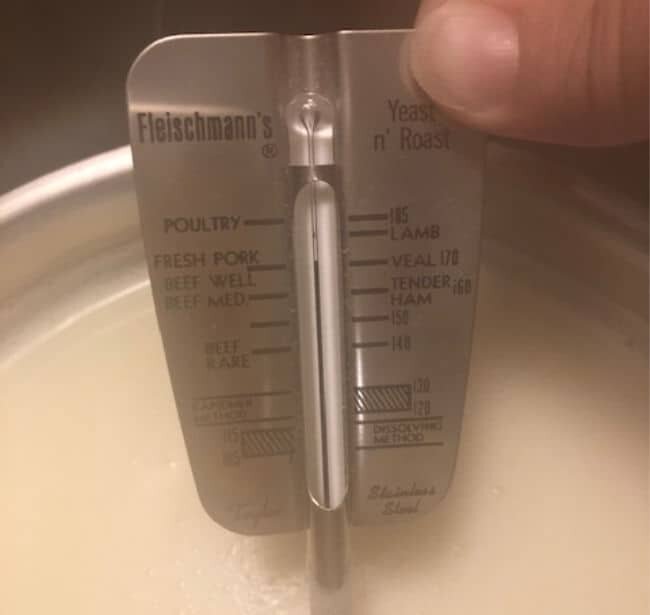
- Meat or candy thermometer (this one is nice because you can hook it to the side of the pot)
- Saucepan big enough to hold the milk
- Cheesecloth (1 package)
- Cooler large enough to hold the glass/ceramic bowl with room for 4 quart canning jars
- 4 quart canning jars or something similar (containers need to fit in the cooler and hold hot water)
- Colander
- Kitchen towel
Let’s get Started Making Yogurt
Step One: Warm the Milk

Reserve 2 Tbsp of the milk for Step 3. Pour the rest of the milk into a saucepan and heat over medium heat until it reaches 180F.
Please watch the milk carefully and stir often so it doesn’t burn. And don’t get impatient like I did and end up burning some onto the bottom of your pot because it’s a real bugger to scrub off!
Step Two: Let it cool
As soon as the milk reaches 180F, take it off the heat and pour the milk into your glass or ceramic bowl.
Leave it uncovered and allow it to cool to 105-110F. This may take anywhere from 20 minutes to an hour, depending on air temperature.
Note: The reason you leave it uncovered during this step is to allow bacteria from the air to get into the milk. I know, it’s weird and a little creepy, but it’s ok, I promise!

Step Three: Prepare and Add your Culture
Take the 2 Tbsp milk you had reserved and the 2-3 Tbsp yogurt (or probiotic capsules) and mix them.

Add the mixture to your milk and stir thoroughly to combine.
NOTE: You might notice the “skin” on the milk in the above picture. You can either stir that back in or just skim it off. If you stick a spoon in and swirl it around, the skin will stick to the spoon and you can lift it out.
Step Four: Give your Yogurt Time to Culture
Place a lid over your dish (I just invert a dinner plate over it), then cover it with a dishtowel.
Place your dish of milk into the cooler and place 4 quart canning jars full of very hot water around the dish in the cooler.
I don’t heat my water, just use the hottest water I can get from my tap, but if your tap doesn’t produce very hot water, you might want to heat it a bit. It doesn’t have to be boiling, I just try to make sure it’s hot enough that I can just barely touch it.
Leave the canning jars uncovered, you want a very warm and humid environment in your cooler to allow all that good bacteria to do its work.
And please remember to put a lid (or inverted plate) on your dish! I forgot that step and tried to put the dishtowel on top without the lid. Let’s just say it was messy.
Place the lid on the cooler and leave it for 7 to 8 hours or overnight.
Step Five: Refrigerate your Yogurt
Check your yogurt after the time has elapsed. If it has thickened and tastes good to you, place it in the refrigerator for 3 hours to thicken and cool.
It’s going to thicken more once it’s in the fridge and you strain it in a later step, but it should have noticeably thickened when you check it.
The taste should be a bit tangy. This time, mine ended up staying in the cooler for 14 hours before it had the tang I like. Be patient with this step.
Step Six: Strain your Yogurt
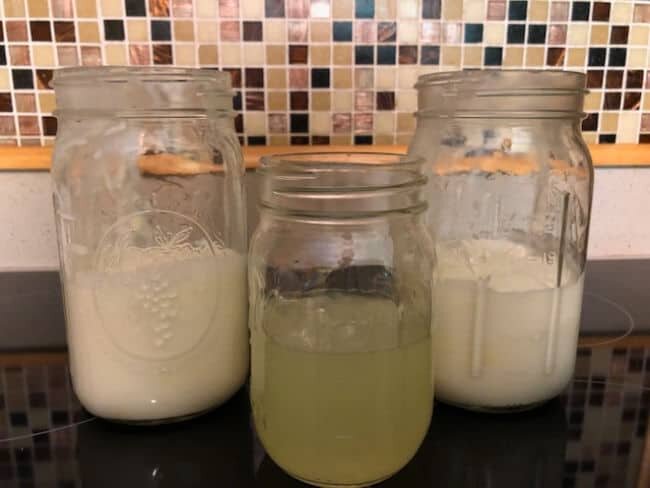
Place a colander into a larger bowl or the sink and put 4 layers of dampened cheesecloth into the colander.

NOTE: If you’re planning to keep the whey (that’s the liquid that drains out), put the colander in a bowl to catch it. Not sure what to do with the whey? Here are 18 things you can try! I’m probably going to water my plants with it.
Carefully pour your yogurt into the colander and allow it to drain. An hour is usually sufficient, but if it isn’t thick enough for your liking after an hour, you can repeat the process with new cheesecloth to drain and thicken it further.
Step Seven: Eat and enjoy!
I’ll use the whey to feed my plants
That’s it! Your yogurt is done! You can now put it in containers and store it in the fridge. I believe it will easily keep a week under refrigeration, although it’s never lasted long enough for me to find out ~ it’s that good!
NOTE: It’s a bit of a pain (and messy!) to get the yogurt out of the cheesecloth-covered colander and into the jars. If you find a less messy way to do it, please let me know in the comments!
Homemade yogurt made from raw milk has a flavor that’s difficult to describe. My mom describes it as earthy, I think it tastes richer and more “alive” than the store-bought versions. I know, I know, that sounds strange. You’re just going to have to try it yourself to find out.
Remember that this yogurt is completely unsweetened, so it’s not going to taste like grocery store yogurt. If you’re used to the sweetened kind, you’ll want to add a bit of honey, sugar or stevia to sweeten it. I love to add gluten-free granola and some fruit (right now it’ll be fresh strawberries, since they’re in season, YUM!).
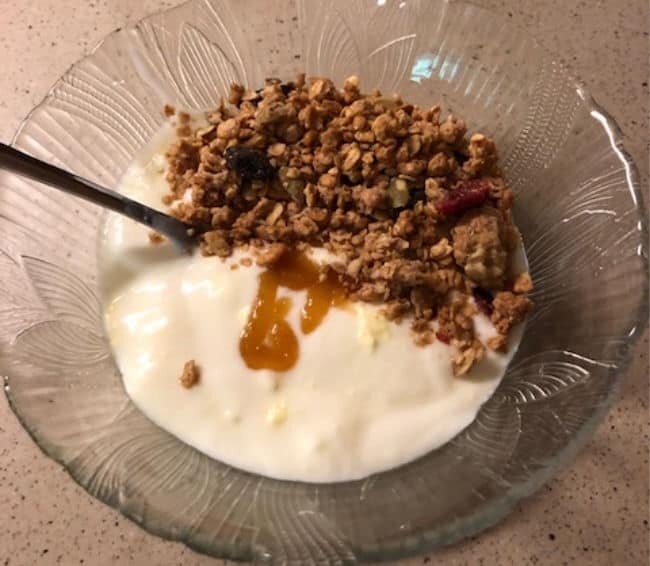
An interesting add-in for yogurt (although maybe more appropriate for fall) is canned pumpkin. I guess you could use pumpkin pie filling, but there’s a lot of sugar and other stuff in that. Just use a bit of plain canned pumpkin, add sweetener to taste and some cinnamon or nutmeg, if you like. A handful of pecans adds a nice crunch to this as well. It’s a rich and satisfying snack that’s also nutritious and not loaded with calories or preservatives.
TIP: Don’t forget that if you’re going to be making another batch of yogurt, you’ll want to save 2 Tbsp of yogurt from this batch to culture the new one.
I hope you’ve enjoyed today’s post and you’ll give making homemade yogurt a try. I’m going to put a printable version of this recipe in the Subscriber’s Resource Library, so if you’re not an email subscriber, be sure to sign up here so you can grab that. There are tons of other great resources there as well, and I send out a weekly newsletter to keep you updated on blog happenings. No spam ever, I promise!
Did you try this recipe? What did you think? Please comment and let me know how it went. Any questions? Feel free to ask, I’ll be happy to answer!
You’ll find a couple of pinnable images below. Please pin to your Recipes board so you can find this post for future reference.
Otherwise, smile and have a crazy organic day!


9 comments
Love homemade yoghurt, even though I’m lactose-intolerant, lol! When I was a child I remember my dad making it in a special 6-jar plug-in yoghurt maker. Probably an antique now!
Probably, LOL! This is so easy, though, you don’t even need a yogurt maker.
I am just not a fan of milk .. I use some coconut milk to make smoothies.. otherwise I never use milk for anything.. But I will tell ya… That looks SOOOOOOOO yummy.
It really is! I’m not really a milk fan, in that I don’t drink milk in and of itself. I have to admit to a serious weakness for ice cream, and this yogurt is truly sooooo good!
I’m reading this at the office and NOW my stomach is growling! And I am curious about how different the taste is from store bought. I’ve made butter before but never yogurt.
🙂 gwingal
ps. We had raw milk all the time growing up! And mama & daddy did growing up….
It’s hard to explain how it’s different, but it’s richer, fresher, it’s almost like it’s more alive, which sounds weird, but that’s the best way I can describe it. You’re just going to have to try it and see! 🙂
I don’t do cows milk but a very informative article..
I wonder if you could use goat or sheep’s milk? I wouldn’t see why it wouldn’t work…..I know it doesn’t work with ‘substitute’ milks like coconut or almond, not the right kind of bacteria.