
Reading and Understanding a Seed Packet
If you’re an experienced gardener, you’re probably already very familiar with the different parts of a seed packet and what they mean.
However, if you’re new to this stuff, the back of a seed packet may look a tad intimidating. I promise, it’s really not that bad, and I’m going to walk you through what each part means so you’ll be able to give your new plants the very best start possible.
What’s on a Seed Packet?
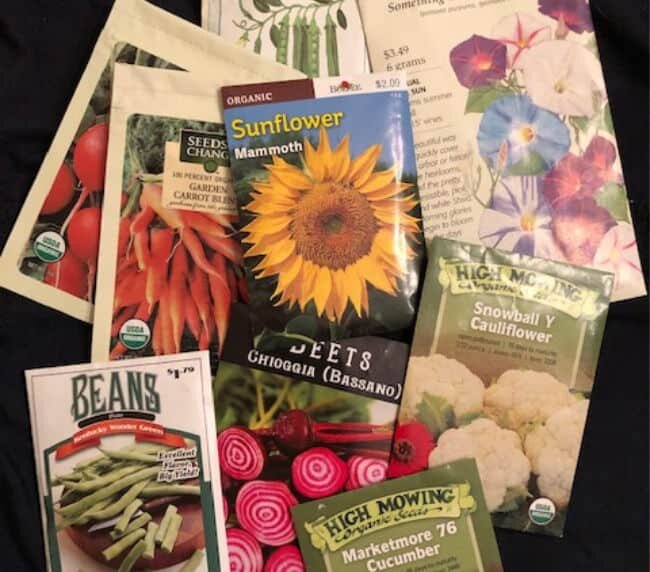
Each seed company is going to include slightly different information on their packets, but there will always be similarities. At a minimum, you should see how deep to plant the seed, ideal planting temperature or time, how far apart to space the plants, how long it will take the seed to sprout, and what the light requirements of the plant are (although not all seed packets have this one).
Additionally, some will tell you how far apart to space your rows, how many days from planting to harvest, and any additional information they think you should have, usually in a section titled “planting tips” or “planting instructions”.
Maybe you really need to get your garden started before you even think about seed packets. I’ve got posts on Preparing your Spring Garden and Tips for Beginning Gardeners that will help. If you’re not sure what varieties of plants you’d like to grow, check out my New Varieties post here.
Now, let’s go through each category separately.
Days to Germination
This category is pretty self-explanatory, I think, it just means how many days from the time you plant your seeds until the time you start to see them emerge.
However, some packets call this “days to germination”, some “sprouts in…”, some “days to germinate” and some “days to emerge”. They all mean the same thing.
You’ll also notice this is never a specific day, but rather a range, sometimes as large as 10 days or more. For instance, my packet of heirloom morning glories gives a range of 5 to 15 days, while my Sabre shelling peas say 7-10 days.
This post contains affiliate links. When you make a purchase through one of these links, I receive a small commission. This does not affect your purchase price.
What influences time to germination?
Time to germination is heavily influenced by soil temperature, so cooler soil is going to cause slower germination, whereas warmer soil will speed things up a bit. If, say, I were to plant my morning glories and then we had a run of cool, cloudy days, I wouldn’t expect to see any activity for at least 2 weeks, maybe even longer.
Don’t give up and assume your seeds have died, even if you don’t see anything by the latest day listed on the packet. Last year, I planted my peas outside in early spring, and then we had some very cold days, and it snowed. Cold and snow aren’t a problem for peas, but they do slow things down.
Although they were “supposed” to germinate in 7-10 days, I didn’t see anything for almost 3 weeks. I was patient and left them alone, and they finally grew once the weather warmed and the sun came out. Slow germination doesn’t hurt anything in the long run, we still had a great harvest.
Ideal Planting Temperature or Date
Different companies handle this one differently. You might see “ideal temp” or “plant in x month” in the little graph on the side of the packet, or you might see this information in the planting tips.
Ideal temp does NOT refer to air temperature, but rather soil temperature. You can find an inexpensive soil thermometer at any garden center for just a few dollars, which will be very helpful.
I personally don’t like when it says what month to plant in. This varies so greatly based on your hardiness zone that it’s almost useless. For instance, in the case of my peas, the packet says to plant in March through May, and then again in July through August (for a fall crop). March through May is a VERY large window. If I were to plant my peas in May here in Zone 6b, I would never get a crop before the weather got too hot for them.
If your packet lists planting months like this, I would suggest doing a little further internet research to help you with more specific dates. You can also subscribe to my email list, and you’ll receive, as part of my welcome emails, a Countdown to Spring Guide that lists dates a bit more specifically for you, as I’ve based them on hardiness zones. As a subscriber, you also have access to my Resource Library (under For Subscribers Only on the top menu bar), which gives you instant access to the Countdown to Spring and several other freebies exclusively for subscribers. You can sign up here if you’d like.
If the information is in the planting tips, it’s often a bit more detailed. For instance, back to my morning glories. They actually have a “when to sow outside” section and a “when to start inside” section. It specifies to sow outside 1-2 weeks after average last frost AND when soil temps are at least 65F, and to start inside 4-6 weeks before you anticipate transplanting them outside.

Seed Depth
The seed depth refers to how deeply the seeds should be buried when you plant them. You’ll typically see 1/4″, 1/2″, 3/4″, 1″ or surface sow.
A good rule of thumb is that the larger the seed, the deeper you’ll be planting it. For instance, marshmallow seeds are very tiny (yes, there is such a thing as a marshmallow plant. Cool, huh?) and their planting depth is 1/4″, while peas are much larger and have a planting depth of 1″.
I promise you don’t need to get a ruler and make sure each seed is planted at exactly the depth listed. If it says 1/4″, know that you’re going to place the seed and then put just a little bit of soil over the top, while 1/2″ will need to be a little deeper. Don’t drive yourself crazy.
What is “surface sow”?
However, if the planting depth is “surface sow”, this is important. Most seeds require darkness to germinate, hence why we bury them. However, there are a rare few that need light.
If your packet says surface sow, place your seed on the surface and lightly press it into the soil without covering it. It needs contact with the moist soil to signal it to germinate, but it must have light or nothing will happen.
Seed/Plant Spacing
You may see both of these on your packet or just one.
Seed spacing refers to how closely you should plant your seeds, either indoors in pots or outdoors in your garden. These numbers are usually in the low inches, 2″, 3″, etc.
You might even see something like “A group of 4 seeds every 6-12 inches”. You’ll often see this in the winter squash and pumpkin seeds, where they will say to plant a certain number of seeds per hill.
You may also see “plant spacing” or “plant spacing after thinning”. This number will typically be larger than the seed spacing, often 12″, 18″ or even 2 feet, depending on the size of the mature plants.
Now, obviously, if you’ve planted your seeds 3 inches apart but the mature plants are to be 12 inches apart, you’ve got to do something. That’s what thinning is all about.
Culling or Thinning your Plants
Once the seedlings have come up, you’ll need to make the tough decision to cull some of them. It’s best to do this by snipping with a pair of scissors right at the soil line instead of pulling them. This keeps you from disturbing the roots of the plants growing next to them. If you have two very close together, cull the weaker or smaller of the two.
So why, you ask, did I plant the seeds so closely to begin with? I’m glad you asked! You always want to plant seeds more closely than your final plants will be spaced because you’re never (or very rarely) going to get 100% germination. Planting more than you’ll ultimately need means you should end up with nice full rows of plants.
And if you happen to have a larger space where a bunch of seeds didn’t come up, you can gently lift a plant from an area you need to thin and move it over. Some seedlings don’t like to be transplanted, so be as gentle as you can, and get as much soil around the roots as possible so the disturbance is minimized.
Row Spacing
Some, but by no means all, plant packets will specify row spacing. This is, as it sounds, how far apart you should space rows of these plants, if you’re planting more than one.
For instance, my cucumber packet says row spacing should be 5-6 feet!! Now you’re probably wondering how in the world you’re going to grow cucumbers because your garden isn’t the size of a football field.
Take heart. That number is if you were to let your cucumbers grow all over the ground, but you’re not going to do that. You’re going to grow them on a trellis. If you don’t already have one, feel free to hop up to the top of this post and grab your free trellis plans. This trellis is one my hubby came up with that took him just one afternoon to build, and grows cucumbers, peas, beans and probably anything else you can think of, up off the ground.
Growing vertically not only saves space, but it keeps your fruits from getting ruined by wet ground. It also helps lessen the chances of diseases like powdery mildew, as air flow is so much better when plants are growing up versus when they’re flat on the ground.
Now, with a crop like tomatoes, you do want to listen to the row spacing instructions. I know this from experience. Bitter, bitter experience. Even if you cage your tomatoes (and you should), they still expand quite a bit laterally and need space.
One year, I didn’t pay attention and planted my tomatoes much too close together. I then spent several weeks creeping between them on my hands and knees to harvest because it was the only way I could get to the tomatoes.
No fun, especially because there were spiders under there. <<shudder>> (By the way, spiders are the good guys in the garden and I would never kill one, but I also don’t want to get that up close and personal with any, thank you very much!)
Days to Harvest or Days to Maturity
This will, of course, only apply to crops you’ll be eating. Not all packets have this information. If you can’t find it on the packet, a quick Google search of your specific variety should yield this info.
This is particularly important with crops that you can’t see, for instance, carrots or beets, because you want a general idea of when to check that they’re ready. Obviously, you can check a cucumber or zucchini right on the vine, and this number would even be rather subjective because you might like your cucumbers small, while I might like mine a bit bigger. Still, it gives you a good general idea of when you can expect to get your crop.
This number is also important when you’re dealing with long season crops and you live farther north. If a crop says days to harvest are 120, that’s a full four months of temps warm enough for germination, then warm enough for the crop itself, and before any danger of frost. Not happening in CT most years, or it would be too close to chance!
For instance, years ago, it was almost impossible to grow lima beans here successfully because their days to harvest were just too long. Newer varieties have since come out with shorter days to harvest so they can be grown in a broader range of climates.
“Cheating” on Days to Harvest
If the days to harvest are too long for your area but you really want to try a certain crop, you can beat that a bit by starting seeds indoors. Don’t make the mistake of assuming that if you grow your seeds indoors for 6 weeks, that shortens your days to harvest by 6 weeks. Nope, sorry.
It will shorten the time frame a bit, but there’s no precise measure for how much. Just know that it’s not the full time they grew indoors. Still, it’s worth a try with longer season crops like limas, tomatoes and melons.
Light Requirements
You will often see this on packets of flower seed, not quite as much on vegetable seed. This is, I believe, because almost all vegetables require full sun to produce well.
There are exceptions, of course, many of the cool season veggies can stand a bit of shade, but almost all warm season veggies (tomatoes, summer squash, sweet potatoes, snap beans, etc.) require full sun.
So what do the different light requirement terms mean?
Full sun means at least 6 hours of direct sunlight per day. However, when talking about vegetables, many really need 8 to 10 hours for full production. That’s a lot of sunlight! This is why where you situate your vegetable garden is so important.
Partial sun/partial shade both mean your plant is happy with 3 to 6 hours of direct sunlight per day.
However, there is a subtle difference between partial sun and partial shade. Partial sun plants need at least 3 hours of sun per day to flower or fruit effectively. With partial shade plants, on the other hand, your concern should be situating them in such a way that they’re protected from the intense, hot, mid-afternoon sun.
Full shade is a bit of a misnomer. Nothing grows well in the dark (except mushrooms!) Full shade plants can, however, survive on less than 3 hours of direct sunlight each day, as long as they get dappled sunlight (like what you would find under an oak or other deciduous tree) for several more hours.
Plant Height
This one is pretty self-explanatory. This is the height the plant will reach at maturity. Most likely, you’d be more concerned with this when designing a flower garden, but you may see it on veggie packets as well.

Planting Tips/Instructions
Not all seed packets have this section, but if yours does, take a look at it. Botanical Interests has very detailed seed packets, like the one above, which can make life much easier. Sometimes you’ll learn more about the plant’s history, or a quirk that makes it difficult to grow, or maybe a special tip you need to grow it successfully.
My marshmallow seed packet lets me know that it’s a perennial, African native that’s the original source of an Egyptian candy that became today’s marshmallows. It also tells me that the roots can be eaten as a vegetable. I’m actually planting it because it’s pretty, but I might dig one up and try eating it, just for fun.
My morning glory seed packet tells me two things in the extra planting tips that are pretty important, as you can see above. One, the seeds need to be soaked in water for 12-24 hours before planting in order to soften the seed coat, and two, all parts of the plant are poisonous. Both extremely useful pieces of information to have!
My pea seed packet suggests trellising, and even has tips on what type of soil amendment to add when planting, as well as tips for watering at the base of the plants instead of from above to help prevent powdery mildew.
After reading this post, I hope you’ve got a better handle on how to read the information found on your seed packet. I know it’s not the most fascinating subject ever, but understanding your plant’s needs right from the start and following the directions are the best ways to ensure a healthy plant and a bountiful crop.
Posts related to reading a seed packet
Please feel free to ask any questions or leave any comments for me. I personally read and respond to every comment, so would love to hear from you!
Below are 2 pinnable images if you would like to share the love on Pinterest. As always, smile and have a crazy organic day!

2 comments
I love how thorough you are with this.
The only thing I didn’t know about was the description part that lets you know where the plant is from/what can be eaten. But I have never seen those sections but would have loved to.
But then again, this Spring I’ll be planting seeds harvested from last year… well some of it. If they’ve been kept safe enough.
My favorite bits however are the little pieces of advice you seemingly effortlessly just braid into the seed bag walk through – there were actually a number of things I wasn’t aware of. So thank you for that. Absolutely love it❤️
Linda
I’m so glad it was helpful for you and that you enjoyed it! Thank you for commenting.